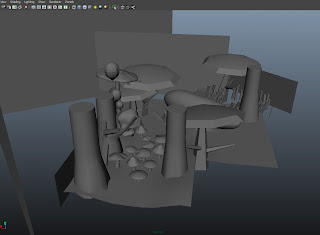
On completion of the textures, it was time to start planning out my scenes and knowing exactly what needs to be done. There was a basic layout set up for the mushroom scene, which will later be spruced up with all the textured plants by one of our 'gardeners' Matt Luxton and hopefully will look really nice because I'll have the camera shots ready to hand over so the shots can have good composition and have some nice framing too.
The problem was with the bouncy mushrooms. It wasn't really thought about until the character rigs were ready and I needed to animate. In the tests I did just before Christmas, there were some basic rigged mushrooms, as nurbs curves:
 And the problem was that they wouldn't move around at all, it just didn't happen:
 That and there were some lovely new models that would replace the nurbs ones. Due to everyone getting along with their tasks and wanting to start animation as soon as, and work to get it done in time for render, I decided to have a dab hand at rigging mushrooms. I was given a basic setup to start with, so I knew where to put stuff according to the world space:
I took this and placed the newly modelled mushrooms according to how I would animate the characters jumping along the mushrooms with just the right gap between them; as they were a bit spacey in the above image, considering the plants were fairly big in relation to size of the character.
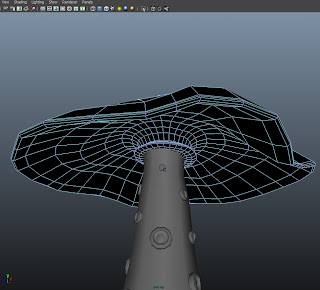
 After setting up the mushrooms, I opened a fresh scene and put two mushrooms in and started my foray into rigging mushrooms. If you ever want to rig a mushroom here it is:
 After setting up the mushrooms, I opened a fresh scene and put two mushrooms in and started my foray into rigging mushrooms. If you ever want to rig a mushroom here it is:
First you need to create some clusters, and place them where the areas to be affected, are. So make sure you're in the Animation control and go Create Deformers -> Cluster. Then place it at the top of the mushroom cap and do the same but place it at a low point of the mushroom cap.
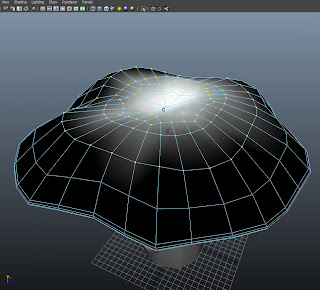
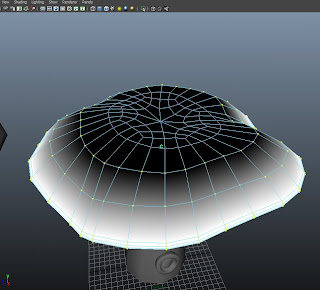
After this we need to set up the affected areas, so when we move that cluster the mushroom also moves. We next select the area we want to be affected with vertices, and go a bit beyond that to give a nice dropoff, and then select the cluster. Then, Edit Deformers -> Paint Cluster Weights. You can now paint over the area you want to be affected, the images below show how I did it on my caps for the top, and the low point:

Once satisfied with the results, we need some controls to easily pick and animate away. Create two NURB's circles and place them roughly in line with the clusters so there's a more accurate way of seeing how far you are moving the affected area up and down.


After painting our areas we can grab the cluster and see how the deformations are, if they're a bit off go to the Paint Cluster Weight tool and select the right cluster and edit till satisfied. (It helps massively to give them a name to know where stuff is in the outliner, or if you have more than a couple clusters in a scene to not get mixed up.)
Important Step: Always freeze the transformations on the controlling element! An excellent habit to get into! So select the circle and in the channel box, highlight Translate, Rotate and Scale (or whatever changed) and Freeze them all. It provides you with a zero point to go back to, where you freeze it, it will become the origin so to speak. So when you start animating, you'll know the original shape/place of the object by zeroing the values.
The last step is to connect it all up, and I used a parent constraint to do this. So select what the parent will be, the Circle and then the child, the Cluster. Then Constrain -> Parent and go to the little box to set any restrictions or keep all the options open for the animator. If you wanted to restrict the movement, I locked the relevant items out in the channel box of the NURB's circle. (And hide them away if it was a definite that translate/rotate/scale wasn't needed as I did for scale on the final scene mushrooms)
 This image below roughly shows the process of the Freezing and Parent Constraining:


Below are the quick tests I did after I'd finished rigging and weight painting them, to see how they bounced and squished in the test scene:
These last two videos are of the test I did with the creature, creating the bounce in the mushrooms in conjunction with character animation, mainly deciding on any other tweaks I could do to make the mushrooms look 'real' enough. After this I did go back and edit the weights on the more rounded mushroom (last jump one) to make the up and down more of smooth and make the polygon edge of the weighting less noticeable. With my textures, they should look pretty good.
No comments:
Post a Comment